Preliminaries
If you want an easy-to-use, open source platform by which to share your ideas, WordPress is a great place to get started. In this tutorial we’ll show you how to install all the necessary components and configure everything appropriately so you can start tinkering with the many features WordPress has to offer you. Before we get started, its assumed that you’ve connected to your Stack via SSH and have created a non-admin sudo user. If you haven’t already, check out our “Getting Started with Ubuntu” tutorial.
WordPress is a very popular content management system (CMS) that has many features that allow its users to make functional websites through an easy-to-use interface. Its an excellent choice for a wide range of people — people with no web development experience can get started fairly quickly and advanced users can take advantage of the plugin architecture to develop and share their own extensions to build upon native WordPress functionality.
WordPress traditionally uses MySQL and PHP as their database management system and scripting language. We’ll show you how to get these packages installed and connect them to your WordPress Installation. Let’s get started.
Installing the Prerequisites
We’ll be using the open-source fork of MySQL that has been widely adopted in the community. Since it is a drop-in replacement for MySQL with basic extensions to its functionality, we shouldn’t have any issues with getting it to work with WordPress. First lets update the Ubuntu package repositories to make sure we have the latest stable versions of the packages we need
sudo apt-get update
Now we can install the MariaDB server package alongside the development libraries needed.
sudo apt-get install libmariadbd-dev mariadb-server
You’ll be prompted to enter a password for the ‘root’ user. Note that this does not correspond to the ‘root’ user on your Ubuntu Stack. The root password you set here will be used to gain root access to your database server. Now that we have MariaDB installed, you can check to see that your installation proceeded correctly by logging in as the root database user. Enter the following into the terminal:
sudo mysql -u root -p
You’ll be prompted for the root password you created at installation time. If everything worked as planned, you should have a prompt reading
MariaDB [(none)]>
We should secure our MariaDB database by using the script that comes bundled with the packages. Type in ‘\q’ to quit the shell at any time. In your Ubuntu shell, run the following:
sudo mysql_secure_installation
You’ll be prompted once again for the root password you set at installation time. You’ll be asked if you wish to change it in the next step. If you’re happy with your choice, pressing return will default to no. The questions following the root password change ask you whether your would like to perform a number of actions. Since each of these gets your database ready for a production environment, you should answer ‘Yes’ to all of them (or just hit enter through all of them).
For the same reason that we create a non-root user with elevated privilages on our Ubuntu Stack, we are going to create a database account that WordPress can use to access the MariaDB database server. In addition, we need to create a ‘wordpress’ database where WordPress will store all the necessary posts and user data. First, log into MariaDB using the root user as we did before
mysql -u root -p
Now run the following command in the MariaDB shell to create the wordpress database
CREATE DATABASE wordpress;
We’ve created the wordpress database — now we just need to create the user with which WordPress can access this database. We’ll call this user ‘wordpressaccess’. Run the following command in the MariaDB shell:
CREATE USER 'wordpressaccess'@'localhost' IDENTIFIED BY 'enter_password_here';
You should replace ‘enter_password_here’ with a secure password and note it somewhere safe. We’ll be using it in a a few moments while configuring the actual WordPress installation.
We’re now going to grant the ‘wordpressaccess’ user full privileges to the wordpress database.
GRANT ALL PRIVILEGES ON wordpress.* TO 'wordpressaccess'@'localhost';
We’ve granted the access user account to have all privileges on ‘wordpress.*’ which means that ‘wordpressaccess’ has access to all tables in the ‘wordpress’ database. Finally, if we reload the privilege tables we’ll be able to log in as ‘wordpressaccess’ and move on.
FLUSH PRIVILEGES;
To verify that we set everything up correctly, log in as the access user
mysql -u wordpressaccess -p
Once you’ve connected to the server, see if you have appropriate access privileges by listing all the databases available to you.
SHOW databases;
After this step, you’re all done installing and configuring MariaDB!
Now let’s install the PHP and all its required extensions. Once again, we use apt-get to install a number of packages. If you do not wish to be prompted about whether you really want to install certain packages, you can use the -y flag to auto accept.
sudo apt-get install -y php5 php5-cli php5-dev php5-fpm php5-cgi
php5-mysql php5-xmlrpc php5-curl php5-gd php-pear php5-imap php5-mcrypt php5-pspell libssh2-php
There isn’t much configuration to be done with PHP — we’ll continue on by installing the apache web server now.
sudo apt-get install apache2 libapache2-mod-php5
Once again, there isn’t much configuration to be done for apache. All we need to do is to restart the apache web service and MariaDB server and we can move on and install WordPress.
sudo service apache2 restart && sudo service mysql restart
Installing WordPress
Lets cd into our home directory and download/extract the wordpress tarball from the official repositories.
cd ~
wget https://en-ca.wordpress.org/wordpress-4.2.2-en_CA.tar.gz
tar xvf wordpress-4.2.2-en_CA.tar.gz
We need to copy the files in the ‘wordpress’ directory that was extracted to our apache webserver document root so we can access the site using our browser
cd ~/wordpress
sudo cp -r * /var/www/html
rm -f /var/www/html/index.html
We have one more file we need to configure on the server before we can start managing content on our WordPress installation. We’ll need to copy over the sample wp-config file and make some changes.
cp /var/www/html/wp-config-sample.php /var/www/html/wp-config.php
Now open up the wp-config.php file in your favourite text editor
nano /var/www/html/wp-config-sample.php
Now find the lines
// ** MySQL settings - You can get this info from your web host ** //
/** The name of the database for WordPress */
define('DB_NAME', 'database_name_here');

/** MySQL database username */
define('DB_USER', 'username_here');

/** MySQL database password */
define('DB_PASSWORD', 'password_here');
Replace the ‘database_name_here’ field with ‘wordpress’ — we created this database in MariaDB earlier. Similarly, replace ‘username_here’ and ‘password_here’ by ‘wordpressaccess’ and the password you defined for the ‘wordpressaccess’ database account earlier. Once you’re done, press CTRL-X, Y, and Return to save changes and exit.
If you point your browser now to your Stack’s IP address, you’ll be shown this page
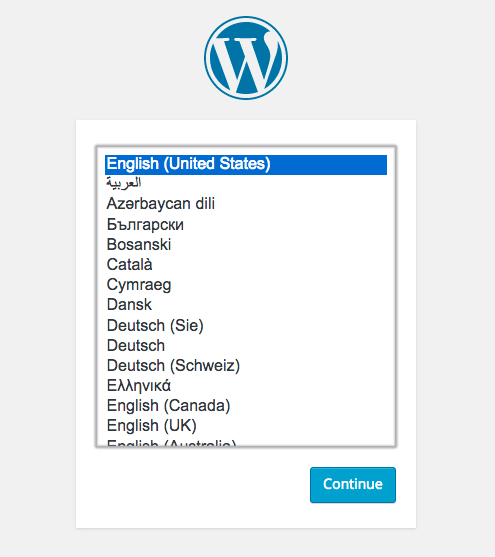
This means that you have a running installation of WordPress! Once you complete these forms, you’ll be taken to a login page after which you’ll be able to interact with the WordPress dashboard.